 I recently decided to change Twitter usernames from “chownage” to “kylechowning.” As to why, my main motivation is because people will know me before they’ll know chownage. Moreover, there are SEO (search engine optimization) benefits and overall, it just makes it easier for people to recall and reference.
After making the change, I got a few questions asking me how I did it and if there were any negative ramifications from doing so. The short answer is, it was easy and there weren’t any problems. However, the challenge that I encountered was that I had already registered the “kylechowning” username a year or so ago and there were pre-existing friends on that account. Because I didn’t want to start from scratch on either accounts, I had to get creative on making the swap.
By the way, if your new username of choice is not already taken, here are simple instructions on how to change your username. These instructions focus on swapping usernames of two currently existing accounts.
The following steps use the example of changing my main account chownage to kylechowning.
- Log in to Twitter
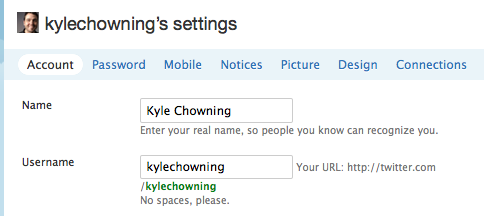
- In the upper right hand navigation bar, click Settings
- Change Username from chownage to chownage2 – This will temporarily free up your current username
- Log out of Twitter
- Log in to your other Twitter account; in this case, kylechowning
- Click Settings
- Change Username from kylechowning to chownage – Now the username kylechowning is available
- Log out of Twitter
- Log in to Twitter using your chownage2 settings
- Click Settings
- Change Username from chownage2 to kylechowning
And your done! Due to the way that Twitter has setup the usernames, you don’t have to change anything within Twitter. All references to your name will change in non-cached Twitter feeds.
If you’ve integrated your Twitter account with any social networks or blogs, you’ll need to change your username so your updates are posted.
Finally, don’t forget to change your settings on your favorite Twitter app(s).
